Loyalty Profile Stream with Engage+ Setup Guide
Overview
|
|
The Loyalty Profile Stream feature offers a streamlined and automated data exchange between Marigold Loyalty and Marigold Engage+ allowing marketers to create personalized and targeted campaigns using member loyalty data with high accuracy, delivering more consistent results than previous import solutions. Loyalty Profile Stream doesn’t require queries, exports and imports, triggered actions, or scheduled jobs. The setup process is intuitive, easy to set up, and requires no scripting or programming.
The feature provides self-service access enabling marketers to configure and manage which member attributes, preferences and metrics should be shared with Engage+ to enable personalization related to the member profile in a campaign. The selected details are sent to Engage+ any time a value changes in Marigold Loyalty, giving higher accuracy of profile attributes with reduced latency and giving marketers the opportunity to create highly personalized campaigns that drive engagement, retention, and loyalty.
This Early Adopter feature may be used for demos, new customer implementations, Early Adopter candidates, and existing customer testing.
|
|
Prerequisites
- During the Early Adopter release phase, the Loyalty Profile Stream feature must be activated by a Marigold Representative in both Marigold Loyalty and in Marigold Engage+.
Use cases to Setup and Enable Marigold Loyalty Profile Stream with Marigold Engage+
1. Set up Profile Stream in Loyalty using standard/default fields only
When you choose to use the standard/default fieldsonly, there is no additional configuration needed in Engage+.
For more information on Choosing data sources for campaigns, refer Campaigns.
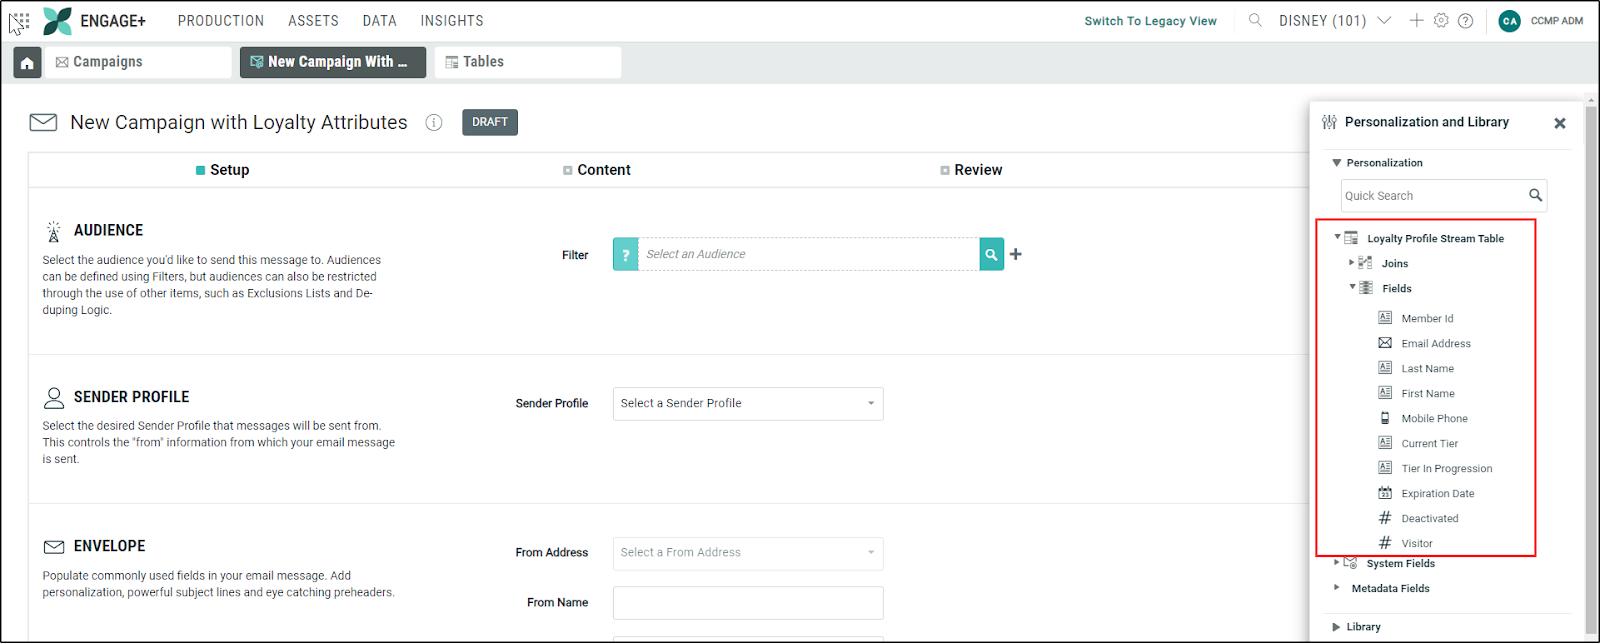
The standard/ default fields include: member_id, email, mobile_phone, first_name, last_name, current_tier, tier_in_progression, expiration_date, deactivated, and visitor.
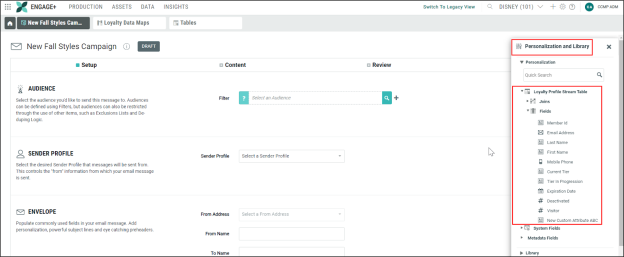
Once the Enabled toggle inside your Loyalty admin panelis switched on, the standard/default fields will begin streaming into Engage+ for your use. You can now access them from the Personalization pane to include in your Engage+ email campaigns.
2. Set up Loyalty Profile Stream in Loyalty using standard/default fields plus manually added fields
If you choose the standard/default fields as defined above, plus add additional Attributes, Preferences, or Metrics, additional configuration steps are required within Marigold Engage+ prior to begin data streaming.
Follow the below steps for both first time configurations and for updates of an existing configuration:
- Access Marigold Loyalty and navigate to the Profile Stream page to begin configuration steps as outlined in Configure Profile Stream in Loyalty.
-
- Standard/ Default fields are automatically configured in the Loyalty Profile Stream setup page.
-
- Search and Select additional fields to be enabled in the Profile Stream.
- Before enabling the Profile Stream in Marigold Loyalty, access Marigold Engage+ to first modify your Loyalty Profile Stream Table, then to modify your Loyalty Datamap.
- Modifying the Loyalty Profile Stream Table
Navigate to Tables by selecting Data > Management > Tables. Tables are used to store your recipient data. Open the dedicated Loyalty Profile Stream Table from your list of existing Tables. This table can be renamed if you wish.
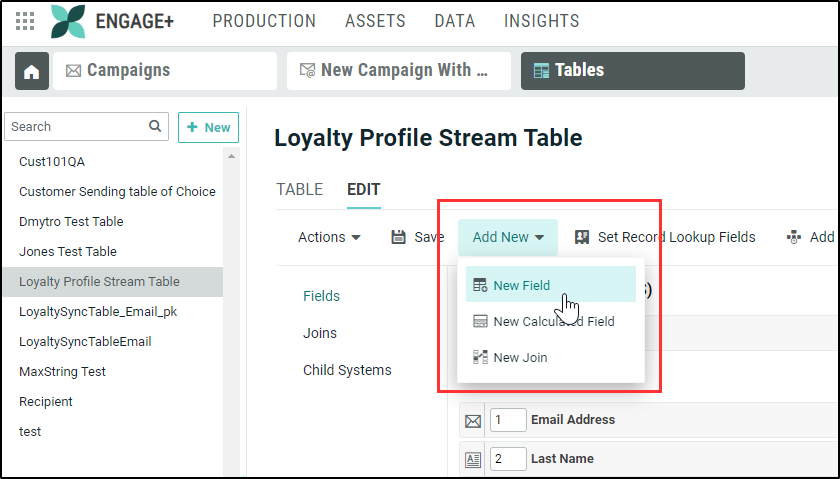
To Add a New Field: Click the Add New drop down and choose New Field. Now add new fields to correspond to the non-standard fields that were manually added to the streaming process in Marigold Loyalty in step 1.
To Remove a Field: Click the X next to any fields you would like to remove.
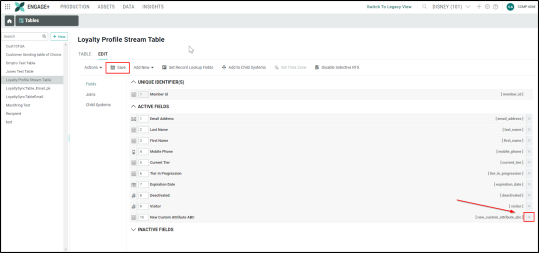
Click Save to save changes made. For more details, refer Online Help.

- Modify the Loyalty Data Map
Navigate to Loyalty Data Maps by selecting Data > Integration > Loyalty Data Maps. Data Maps are used to load inbound data into the desired fields in the correct table and/or joined table.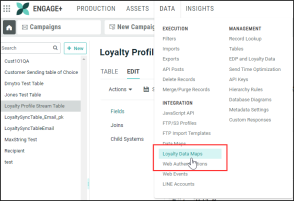
Modify the Loyalty Profile Stream Data Map so that the newly added fields will be loaded into the correct table. For more detailed information, refer Online Help.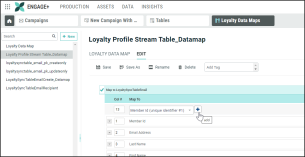
Click Save to save changes made.

3. Enable the configuration and deploy metadata to activate Streaming in Marigold Loyalty.
III. Edit the existing Loyalty Profile Stream previously Enabled
When modifications to a previously enabled Profile Streaming configuration are needed, additional configuration steps are required within Marigold Engage+ prior to updating and re-enabling the Profile Stream Feature in Marigold Loyalty.
Follow the below steps to update an existing configuration:
- Access Marigold Loyalty and navigate to the Profile Stream Page to disable the Streaming Service by moving the Enable Toggle to OFF.
- Deploy metadata to pause the streaming service.
- Perform searches and select additional fields to be enabled in the Profile Stream, if desired, or remove non-default fields from the service by clicking on the delete icon.
- Save any updates performed by clicking on the Save button.
- Prior to re-enabling the Profile Stream in Marigold Loyalty, access Marigold Engage+ to complete the following steps:
-
- Access Marigold Engage+ and navigate to Tables, and modify the table using the same modifications you have made in Loyalty; add any new non-standard fields or remove any fields which are no longer required. See step 2 in Use Case II.
-
- Navigate to Loyalty Datamaps and modify the mapping for the added fields or deleted fields accordingly. See step 2 in Use Case II.
-
- Enable the configuration and deploy Metadata to activate Streaming in Marigold Loyalty.
Use the Imported Data to Personalize your Campaigns
With “Enabled” toggled ON on the Profile Stream page in Marigold Loyalty, your profile Attributes, Preferences and Metrics will be continually streaming, updating your recipient data any time a value changes in Marigold Loyalty.
Next, create an email campaign using your Loyalty Profile Stream table as your data source.
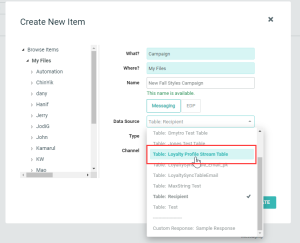
When personalizing your campaign, open the Personalization and Library pane to access and include the imported Loyalty attributes.
